
If you’re an Apple Music user, you might have found yourself wanting to convert your favorite tracks to MP3 format. This can be a bit tricky due to the restrictions Apple puts on its music files. But don’t worry, there are ways to make this happen! In this guide, we’ll walk you through various methods to convert Apple Music to MP3, so you can enjoy your music on any device you choose. Let’s get started!
Key Takeaways
- Apple Music tracks are DRM-protected, making direct conversion to MP3 challenging.
- ViWizard Apple Music Converter is a popular tool for converting Apple Music to MP3 with ease.
- The Apple Music MP3 Encoder is a free option but only works with DRM-free tracks from iTunes.
- Audacity offers advanced editing features for users who want more control over their audio files.
- Always consider legal implications when converting music files, especially for distribution.
Best Tools for Apple Music to MP3 Conversion
Apple Music is great, giving you access to tons of songs. But, the music you download is often protected, meaning you can’t just play it anywhere. That’s where converting to MP3 comes in handy. I’ve been doing this for a while, and it makes enjoying my music on different devices way easier. Let’s look at some of the best tools to get the job done.
ViWizard Apple Music Converter Overview
ViWizard Apple Music Converter is a popular choice for a reason. It’s designed to remove DRM from Apple Music tracks, allowing you to convert them to MP3 and other formats. It’s pretty user-friendly, even if you’re not super tech-savvy. Plus, it often keeps the original audio quality, which is a big win. If you want to download securely, this might be the tool for you.
Apple Music MP3 Encoder Features
Did you know that iTunes (or the Music app on newer Macs) has a built-in MP3 encoder? It’s true! It’s a free option if you already have iTunes installed. However, there’s a catch: it only works with songs you’ve purchased from iTunes or added from CDs – not streaming tracks from Apple Music. Still, if you have a library of purchased music, it’s a convenient way to convert them to MP3 without needing extra software.
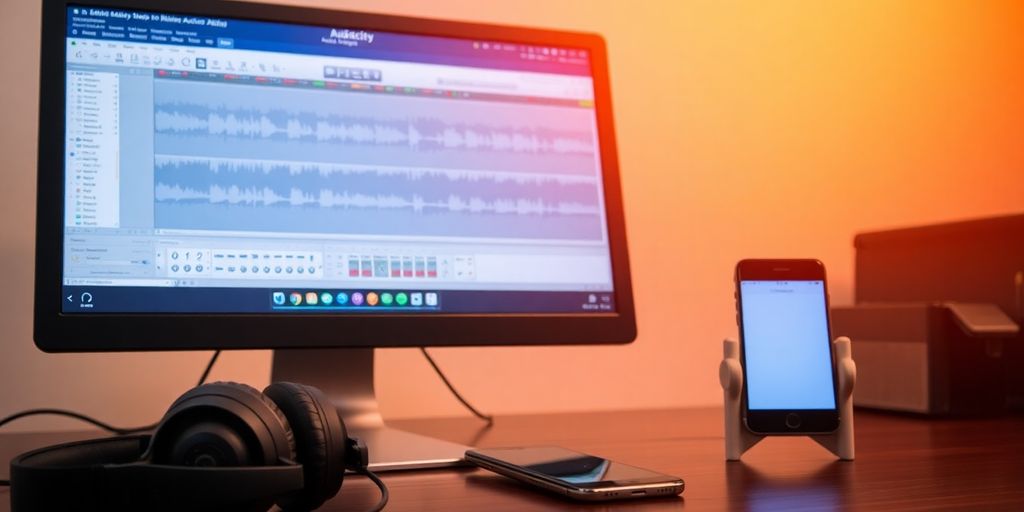
Audacity for Advanced Users
Audacity is a free, open-source audio editor that’s been around for ages. It’s not specifically designed for Apple Music conversion, but you can use it to record audio playing from your computer, including Apple Music. The downside? It’s a bit more complicated than dedicated converters, and you have to play the music in real-time while recording. But, if you’re comfortable with audio editing and want a free option with lots of features, Audacity is worth checking out.
Using Audacity to record Apple Music can be a bit tedious since you have to play the songs in real-time. It’s like recording from a radio, but it works if you’re patient and want a free solution. Just make sure to adjust the recording settings for the best possible audio quality.
Here’s a quick comparison of the tools:
| Tool | Advantages | Disadvantages | Best For |
|---|---|---|---|
| ViWizard Apple Music Converter | Easy to use, removes DRM, high-quality output | Requires installation, paid software | Users who want a simple, effective way to convert Apple Music |
| Apple Music MP3 Encoder | Free, built-in | Only works with purchased tracks, no DRM removal | Users who want to convert their iTunes purchases quickly and easily |
| Audacity | Free, powerful audio editor | More complex, requires real-time recording, no DRM removal | Users who are comfortable with audio editing and want a free, versatile tool |
Using ViWizard Apple Music Converter
ViWizard Apple Music Converter is a popular choice for converting Apple Music to MP3, and for good reason. It’s designed to be user-friendly and efficient, making the process straightforward even for those who aren’t tech-savvy. Let’s take a closer look at how to use it.
Installation and Setup
First things first, you’ll need to get ViWizard Apple Music Converter installed on your computer. Download the Apple Music Converter from the ViWizard official website. The software is compatible with both Windows and macOS, so you shouldn’t have any issues there. Once downloaded, run the installer and follow the on-screen instructions to complete the installation. After installation, open the software and log in with your Apple ID that’s linked to your Apple Music subscription. This login enables ViWizard to scan and load your full music collection—including individual songs, curated playlists, and saved albums—directly into the interface.
Step-by-Step Conversion Process
Once you’ve got ViWizard up and running, converting your Apple Music tracks to MP3 is a breeze. Here’s a step-by-step guide:
- Launch ViWizard Apple Music Converter: Open the application on your computer.
- Add Apple Music Tracks: Click the "+" button to browse your Apple Music library and select the tracks, playlists, or albums you want to convert. You can add multiple items at once.
- Configure Output Settings: Click the settings icon (usually in the upper-right corner) to bring up the audio preferences. From here, you can select MP3 and tweak the sample rate, bit rate, and channel settings to match your audio quality goals. After adjusting everything to your liking, click OK to save your preferences.
- Start Conversion: Click the "Convert" button to begin the conversion process. ViWizard will start converting the selected tracks to MP3 format.
- Locate Converted Files: Once the conversion is complete, click the "History" icon to find the converted MP3 files on your computer. They’ll be saved in the output folder you specified in the settings.
ViWizard integrates seamlessly with the Apple Music Web Player, giving you access to your entire music library. It supports nearly all Apple Music content, including tracks, playlists, albums, and artists—with no download limits. It even supports batch downloading, and its speed—up to 30x faster than many tools—lets you convert entire albums or playlists in minutes, all while preserving metadata.
Adjusting Output Settings
ViWizard offers a range of options for customizing the output settings of your converted MP3 files. This allows you to fine-tune the audio quality and file size to your liking. Here are some of the key settings you can adjust:
- Output Format: Choose MP3 as the output format for maximum compatibility.
- Bit Rate: Adjust the bit rate to control the audio quality. Higher bit rates result in better quality but larger file sizes. Common bit rates for MP3 include 128kbps, 192kbps, 256kbps, and 320kbps. It’s particularly favored by users who want to removes DRM protection, allowing them to transfer tracks not only to Apple devices like the iPod, but also to MP3 players, USB flash drives, and other devices.
- Sample Rate: The sample rate determines the number of audio samples taken per second. Higher sample rates generally result in better audio quality. Common sample rates include 44.1 kHz and 48 kHz.
- Channel: Select the number of audio channels. Stereo is the most common option for music.
By adjusting these settings, you can optimize the output of your converted MP3 files to suit your specific needs and preferences. You can also customize file names, folder rules, and format. While MP3 is the most widely supported, ViWizard also converts to FLAC, WAV, M4A, and more.
Converting with Apple Music MP3 Encoder
Accessing the Encoder
So, you want to use the Apple Music MP3 Encoder? Good choice! It’s a built-in feature, which means no extra downloads. This encoder is part of iTunes (or the Music app on newer Macs). It’s pretty straightforward to find. Just dive into the settings, and you’ll see the options for import settings where you can select the MP3 format. It’s like Apple’s little secret weapon for converting music.
Converting Purchased Tracks
Okay, here’s the deal: this method only works for music you’ve actually purchased from iTunes or files you’ve added to your library. Streaming tracks from Apple Music? Nope, those are DRM-protected and won’t work with this encoder.
Here’s a quick rundown:
- Open iTunes (or the Music app).
- Find the song you bought.
- Go to Preferences, then Import Settings.
- Choose MP3 Encoder and hit OK.
- Right-click the song and select "Create MP3 Version."
It’s that simple! You’ll end up with an MP3 copy right next to your original.
Limitations of the Encoder
Don’t get me wrong, the Apple Music MP3 Encoder is handy, but it’s not perfect. The biggest bummer is the DRM thing. If you’re trying to convert Apple Music tracks you’ve downloaded for offline listening, you’re out of luck. It only works with DRM-free files. Plus, it’s not the fastest tool out there, and you don’t get a ton of control over the output quality. For more advanced stuff, you might want to check out ViWizard Apple Music Converter or something similar.
Honestly, I’ve used the built-in encoder a few times when I just needed a quick MP3 of a song I bought years ago. It gets the job done, but if you’re dealing with a lot of Apple Music tracks, it’s probably not the best option. It’s like using a butter knife to cut a steak – technically possible, but not ideal.
Recording Apple Music with ViWizard Audio Capture
Real-Time Recording Explained
ViWizard Audio Capture offers a different approach compared to direct conversion. Instead of directly converting the files, it records the audio in real-time as it plays. This is particularly useful if you want to capture audio from various sources, including streaming services like Apple Music. It essentially acts like a digital tape recorder for your computer’s audio output.
This method allows you to capture any sound playing on your computer, not just Apple Music. Think of it as a universal audio recorder that can grab sound from web browsers, media players, or even system sounds.
Customizing Recording Settings
ViWizard Audio Capture provides several options to customize your recordings. You can select the output format (MP3, AAC, WAV, FLAC, M4A, M4B), adjust the bit rate, sample rate, and audio channel. These settings allow you to fine-tune the quality and file size of your recordings. For most users, sticking with the default settings is a good starting point, but experimenting can help you find the perfect balance for your needs. You can add music from Apple Music to other apps using this method.
Here’s a quick look at some common settings:
| Setting | Description |
|---|---|
| Output Format | Choose between MP3, AAC, WAV, FLAC, M4A, M4B |
| Bit Rate | Affects audio quality and file size (e.g., 128kbps, 192kbps, 320kbps) |
| Sample Rate | Number of audio samples taken per second (e.g., 44.1 kHz, 48 kHz) |
| Channel | Mono or Stereo |
Saving and Organizing Files
Once you’ve finished recording, ViWizard Audio Capture allows you to save the files to a location of your choice. It also offers basic editing features, such as trimming and splitting, to refine your recordings. You can also edit the ID3 tags, which contain information like the song title, artist, and album. This helps you keep your music library organized and easily searchable. Here are some tips for organizing your files:
- Create folders for different artists or albums.
- Use consistent naming conventions for your files.
- Add or edit ID3 tags to include relevant information.
- Back up your recordings to an external drive or cloud storage.
Using Audacity for Conversion
Importing Apple Music Files
Audacity is a solid, free, open-source audio editor that can be used to record Apple Music and save it as MP3. It’s not as straightforward as using a dedicated converter, but it’s a powerful option, especially if you need to do some audio editing. The first step is to download and install Audacity. It’s available for Windows, macOS, and Linux. Once installed, you’ll need to configure Audacity to record the audio playing on your computer. This usually involves selecting the correct input device in Audacity’s preferences. You’ll want to choose your system’s soundcard or the appropriate audio output device. Then, simply play the Apple Music track and hit the record button in Audacity. Remember that Audacity records in real-time, so the recording process will take as long as the song itself. Audacity is a reliable open-source tool for this task.
Editing and Exporting to MP3
After recording, you might want to clean up the audio. Audacity offers a range of editing tools, such as noise reduction, trimming, and volume adjustment. You can remove unwanted silences, normalize the audio levels, or even add effects. Once you’re happy with the recording, you can export it as an MP3 file. To do this, go to "File" > "Export" > "Export as MP3." You’ll be prompted to choose a location to save the file and adjust the MP3 export settings, such as bitrate and quality. Higher bitrates result in better audio quality but larger file sizes. A bitrate of 128kbps is generally fine for casual listening, while 192kbps or higher is recommended for better quality.
Pros and Cons of Audacity
Audacity is a versatile tool, but it has its drawbacks when it comes to converting Apple Music to MP3. Here’s a quick rundown:
- Pros:
- Free and open-source. No cost to use.
- Powerful audio editing capabilities.
- Cross-platform compatibility (Windows, macOS, Linux).
- Cons:
- Real-time recording is time-consuming.
- No DRM removal. You can only record unprotected audio.
- Can be complex for beginners. The interface has a learning curve.
Using Audacity to convert Apple Music to MP3 is a viable option, especially if you already have it installed or need to edit the audio. However, if you’re looking for a faster, more streamlined solution, a dedicated Apple Music converter might be a better choice. These converters often offer features like batch conversion and automatic DRM removal, which can save you a lot of time and effort. But for those who enjoy tinkering with audio and don’t mind the real-time recording, Audacity is a solid choice.
Transferring Playlists with TuneMyMusic
Sometimes, you might want to move your Apple Music playlists to another platform before converting them to MP3. This can be useful if you prefer using a different music service or want to consolidate your music library. TuneMyMusic offers a way to transfer playlists between different streaming services. Let’s explore how to do this and then download the tracks as MP3s.
Setting Up TuneMyMusic
First, you’ll need to create an account on TuneMyMusic. The process is pretty straightforward: visit their website and sign up. Once you’re in, connect your Apple Music account. You’ll need to authorize TuneMyMusic to access your Apple Music library. After that, you can select the destination platform. Popular choices include Spotify, YouTube, and Deezer. Keep in mind that TuneMyMusic might require a subscription for larger playlists.
Transferring to Another Service
After connecting your accounts, you can start transferring your playlists. Select the playlists you want to move from Apple Music. TuneMyMusic will then scan the tracks and find matches on the destination platform. It’s not always perfect, so double-check that all your songs have transferred correctly. Sometimes, a song might be missing or mislabeled. Once you’re satisfied, confirm the transfer. This process can take a while, depending on the size of your playlists.
Downloading with AllToMP3
Once your playlists are on another service, you can use a tool like AllToMP3 to download the tracks as MP3s. AllToMP3 is a free tool that lets you download music from various platforms. Just copy the playlist URL from your new music service and paste it into AllToMP3. Click download, and the tool will start grabbing the tracks. Keep in mind that AllToMP3 relies on external servers, which can sometimes be unreliable. Also, make sure you’re respecting copyright laws when downloading music. After downloading, organize your files and transfer them to your preferred music library or device.
Legal Considerations for Apple Music to MP3
Understanding DRM and Copyright
Apple Music songs are usually protected by DRM (Digital Rights Management). This protection limits what you can do with the music, even if you’re a subscriber. Think of it like this: you’re renting the music, not buying it outright. DRM is designed to prevent unauthorized copying and distribution. Copyright law protects the rights of the copyright holder, which is usually the artist or record label. Converting Apple Music to MP3 might involve removing this DRM, which could potentially infringe on copyright laws. It’s a bit of a gray area, and the legality depends on how you intend to use the converted files.
Personal Use vs. Distribution
Converting Apple Music to MP3 for your own personal use is different than sharing those files with others. Here’s a breakdown:
- Personal Use: Making MP3s for listening on your own devices, creating backups, or using the music in a non-commercial project might be considered fair use in some jurisdictions. However, even personal use can be legally questionable if it involves circumventing DRM.
- Distribution: Uploading the converted MP3s to the internet, sharing them with friends, or using them in a commercial project without permission is almost certainly a copyright violation. This can lead to legal trouble, including fines and lawsuits.
- Streaming Services: Remember that streaming services have their own terms of service. Converting music to bypass those terms could also be a violation, even if you’re not distributing the files.
It’s important to remember that laws vary by country. What might be acceptable in one place could be illegal in another. Always check your local copyright laws before converting Apple Music to MP3.
Risks of Conversion
Besides the legal risks, there are other potential downsides to converting Apple Music to MP3. Here are a few things to keep in mind:
- Terms of Service Violations: Converting Apple Music to MP3 could violate Apple’s terms of service. While Apple isn’t actively monitoring individual conversions, they could terminate your subscription if they detect suspicious activity.
- Security Risks: Some conversion tools might contain malware or viruses. Always download software from reputable sources and scan files before running them.
- Ethical Considerations: Even if you’re not breaking the law, consider the ethical implications of converting Apple Music to MP3. Artists and record labels rely on streaming revenue to make a living. Circumventing DRM could reduce their income and discourage them from creating new music. If you want to convert Apple Music to MP3, make sure you understand the risks involved.
Final Thoughts
In conclusion, converting Apple Music to MP3 can really open up your music options. Whether you want to listen on different devices or just keep a backup, there are plenty of methods to choose from. Tools like ViWizard make it easy, especially for those tricky DRM-protected files. Just remember, while it’s great to have your music in MP3 format, always keep it for personal use to stay on the safe side of the law. Happy listening!
Frequently Asked Questions
Is it legal to convert Apple Music to MP3?
It depends on your location and how you use the converted files. Apple Music tracks are protected by DRM, and removing this protection might break copyright laws. In some areas, converting music for personal use is allowed, but it’s still risky. Always check your local laws.
Will my Apple Music tracks work after conversion?
No, Apple Music tracks are linked to your subscription. If you cancel, you lose access. However, if you convert songs to MP3, you can keep them. Just remember this goes against Apple’s rules and could have legal consequences.
Does converting Apple Music lower sound quality?
Yes, changing from Apple’s AAC format to MP3 can reduce sound quality due to double compression. To keep the quality high, use a higher bitrate like 320 kbps during conversion. While it won’t match the original, most listeners might not notice the difference.
What tools can I use to convert Apple Music, and are they safe?
Tools like ViWizard, Tunelf, and Noteburner can remove DRM and convert Apple Music to MP3. These tools are generally safe, but using them might violate Apple’s terms. If you use them for personal use and don’t share the files, the risk is lower, but still be cautious.
Can Apple tell if I convert Apple Music to MP3?
Apple doesn’t actively check for DRM removal, but sharing converted files could lead to issues. To stay safe, keep the MP3 files for personal use only and avoid uploading or sharing them.
How can I convert Apple Music to MP3 easily?
You can use tools like ViWizard Apple Music Converter for a straightforward conversion process. It allows you to convert your Apple Music tracks to MP3 quickly and efficiently.